Home>Interior Design>Small Laundry Room Ideas: 19 Compact Designs To Save Space
Interior Design
Small Laundry Room Ideas: 19 Compact Designs To Save Space
Modified: August 28, 2024
Looking for interior design ideas for your small laundry room? Check out these 19 compact designs that will help you save space and maximize functionality.
(Many of the links in this article redirect to a specific reviewed product. Your purchase of these products through affiliate links helps to generate commission for Storables.com, at no extra cost. Learn more)
Introduction
Welcome to our guide on small laundry room ideas! If you have a compact laundry space, you know how challenging it can be to optimize the available space while still maintaining functionality. However, with some creativity and smart design choices, you can transform your small laundry room into a stylish and efficient space.
A small laundry room doesn’t have to feel cramped and cluttered. With the right planning and design, you can create a space that maximizes storage, streamlines workflow, and adds a touch of style to your home. In this article, we will explore 19 innovative and space-saving ideas that will help you make the most of your limited laundry-room footprint.
From utilizing vertical space to incorporating multifunctional furniture and clever storage solutions, we have gathered a range of design ideas that are both practical and visually appealing. Whether you have a laundry closet, a tiny laundry nook, or a compact laundry room, these ideas will inspire you to transform your space into a functional and beautiful area.
So, let’s dive into the world of small laundry room design and discover how you can create an organized and stylish space that meets all your laundry needs without sacrificing style or functionality.
Key Takeaways:
- Maximize every inch of your small laundry room by utilizing vertical space with wall-mounted shelves, compact appliances, and sliding doors for a sleek and efficient design.
- Get creative with storage solutions such as rolling carts, hidden cabinets, and fold-down options to optimize narrow spaces and create an organized and visually appealing laundry room.
Read more: Functional And Fabulous Laundry Room Designs
Utilizing Vertical Space
In a small laundry room, every square inch counts. One of the most effective ways to optimize the space is by utilizing vertical space. By going vertical, you can maximize storage and keep essentials within easy reach.
Install wall-mounted shelves or cabinets that go up to the ceiling. This will create additional storage for detergent, fabric softener, and other laundry supplies, keeping them off the countertop and freeing up space for other tasks. Use baskets or bins to organize smaller items like socks, cleaning supplies, or dryer sheets.
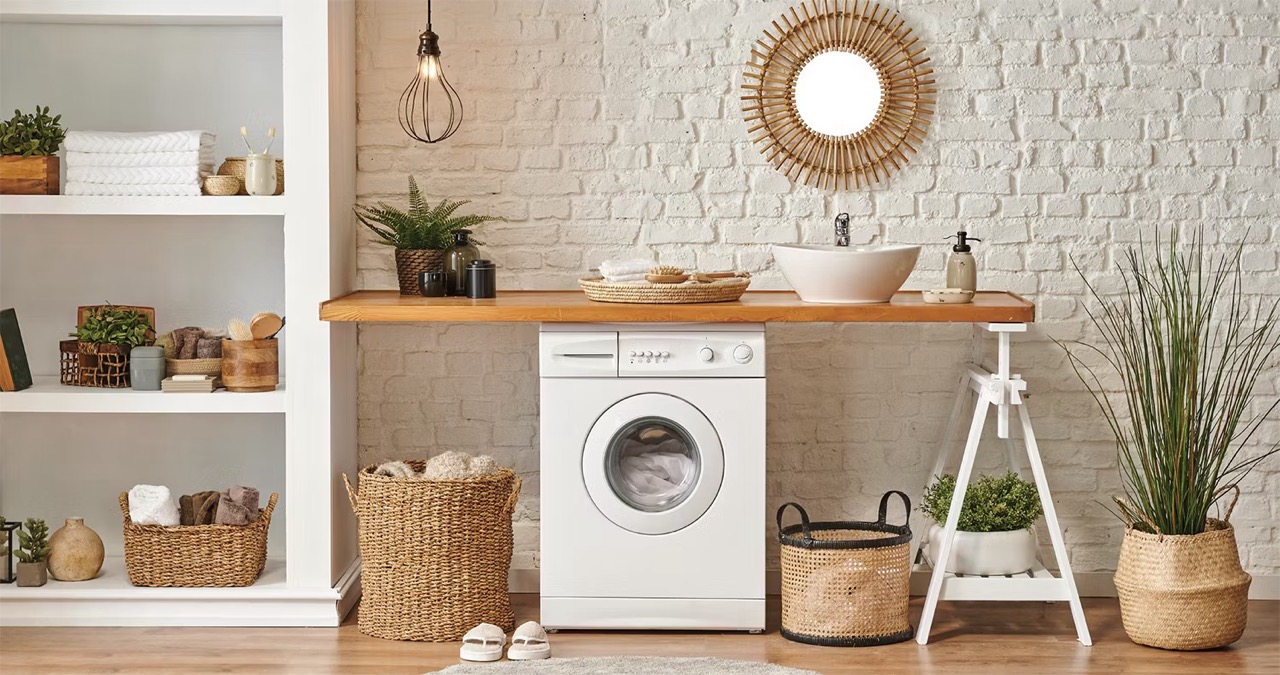
If cabinet space is limited, consider installing floating shelves on the walls. These shelves not only provide extra storage but also offer an opportunity to display decorative elements or plants, adding a touch of personality to the room.
Another option to utilize vertical space is by installing pegboards or hooks on the walls. These versatile storage solutions allow you to hang laundry baskets, ironing boards, or hangers. Pegboards also provide a flexible storage system, as you can move the hooks around to accommodate different items.
For a more efficient use of space, consider installing a retractable clothesline or a wall-mounted drying rack. These space-saving solutions are perfect for drying small items or delicate garments. When not in use, simply fold them away to free up valuable floor space.
Don’t forget about the back of the laundry room door! Mounting hooks or an over-the-door organizer can provide a convenient spot to hang wet clothes, reusable bags, or even a laundry bag.
By taking advantage of vertical space, you can create a clutter-free and organized laundry room that optimizes every inch of available area. Embrace the vertical dimension to make the most of your small laundry room.
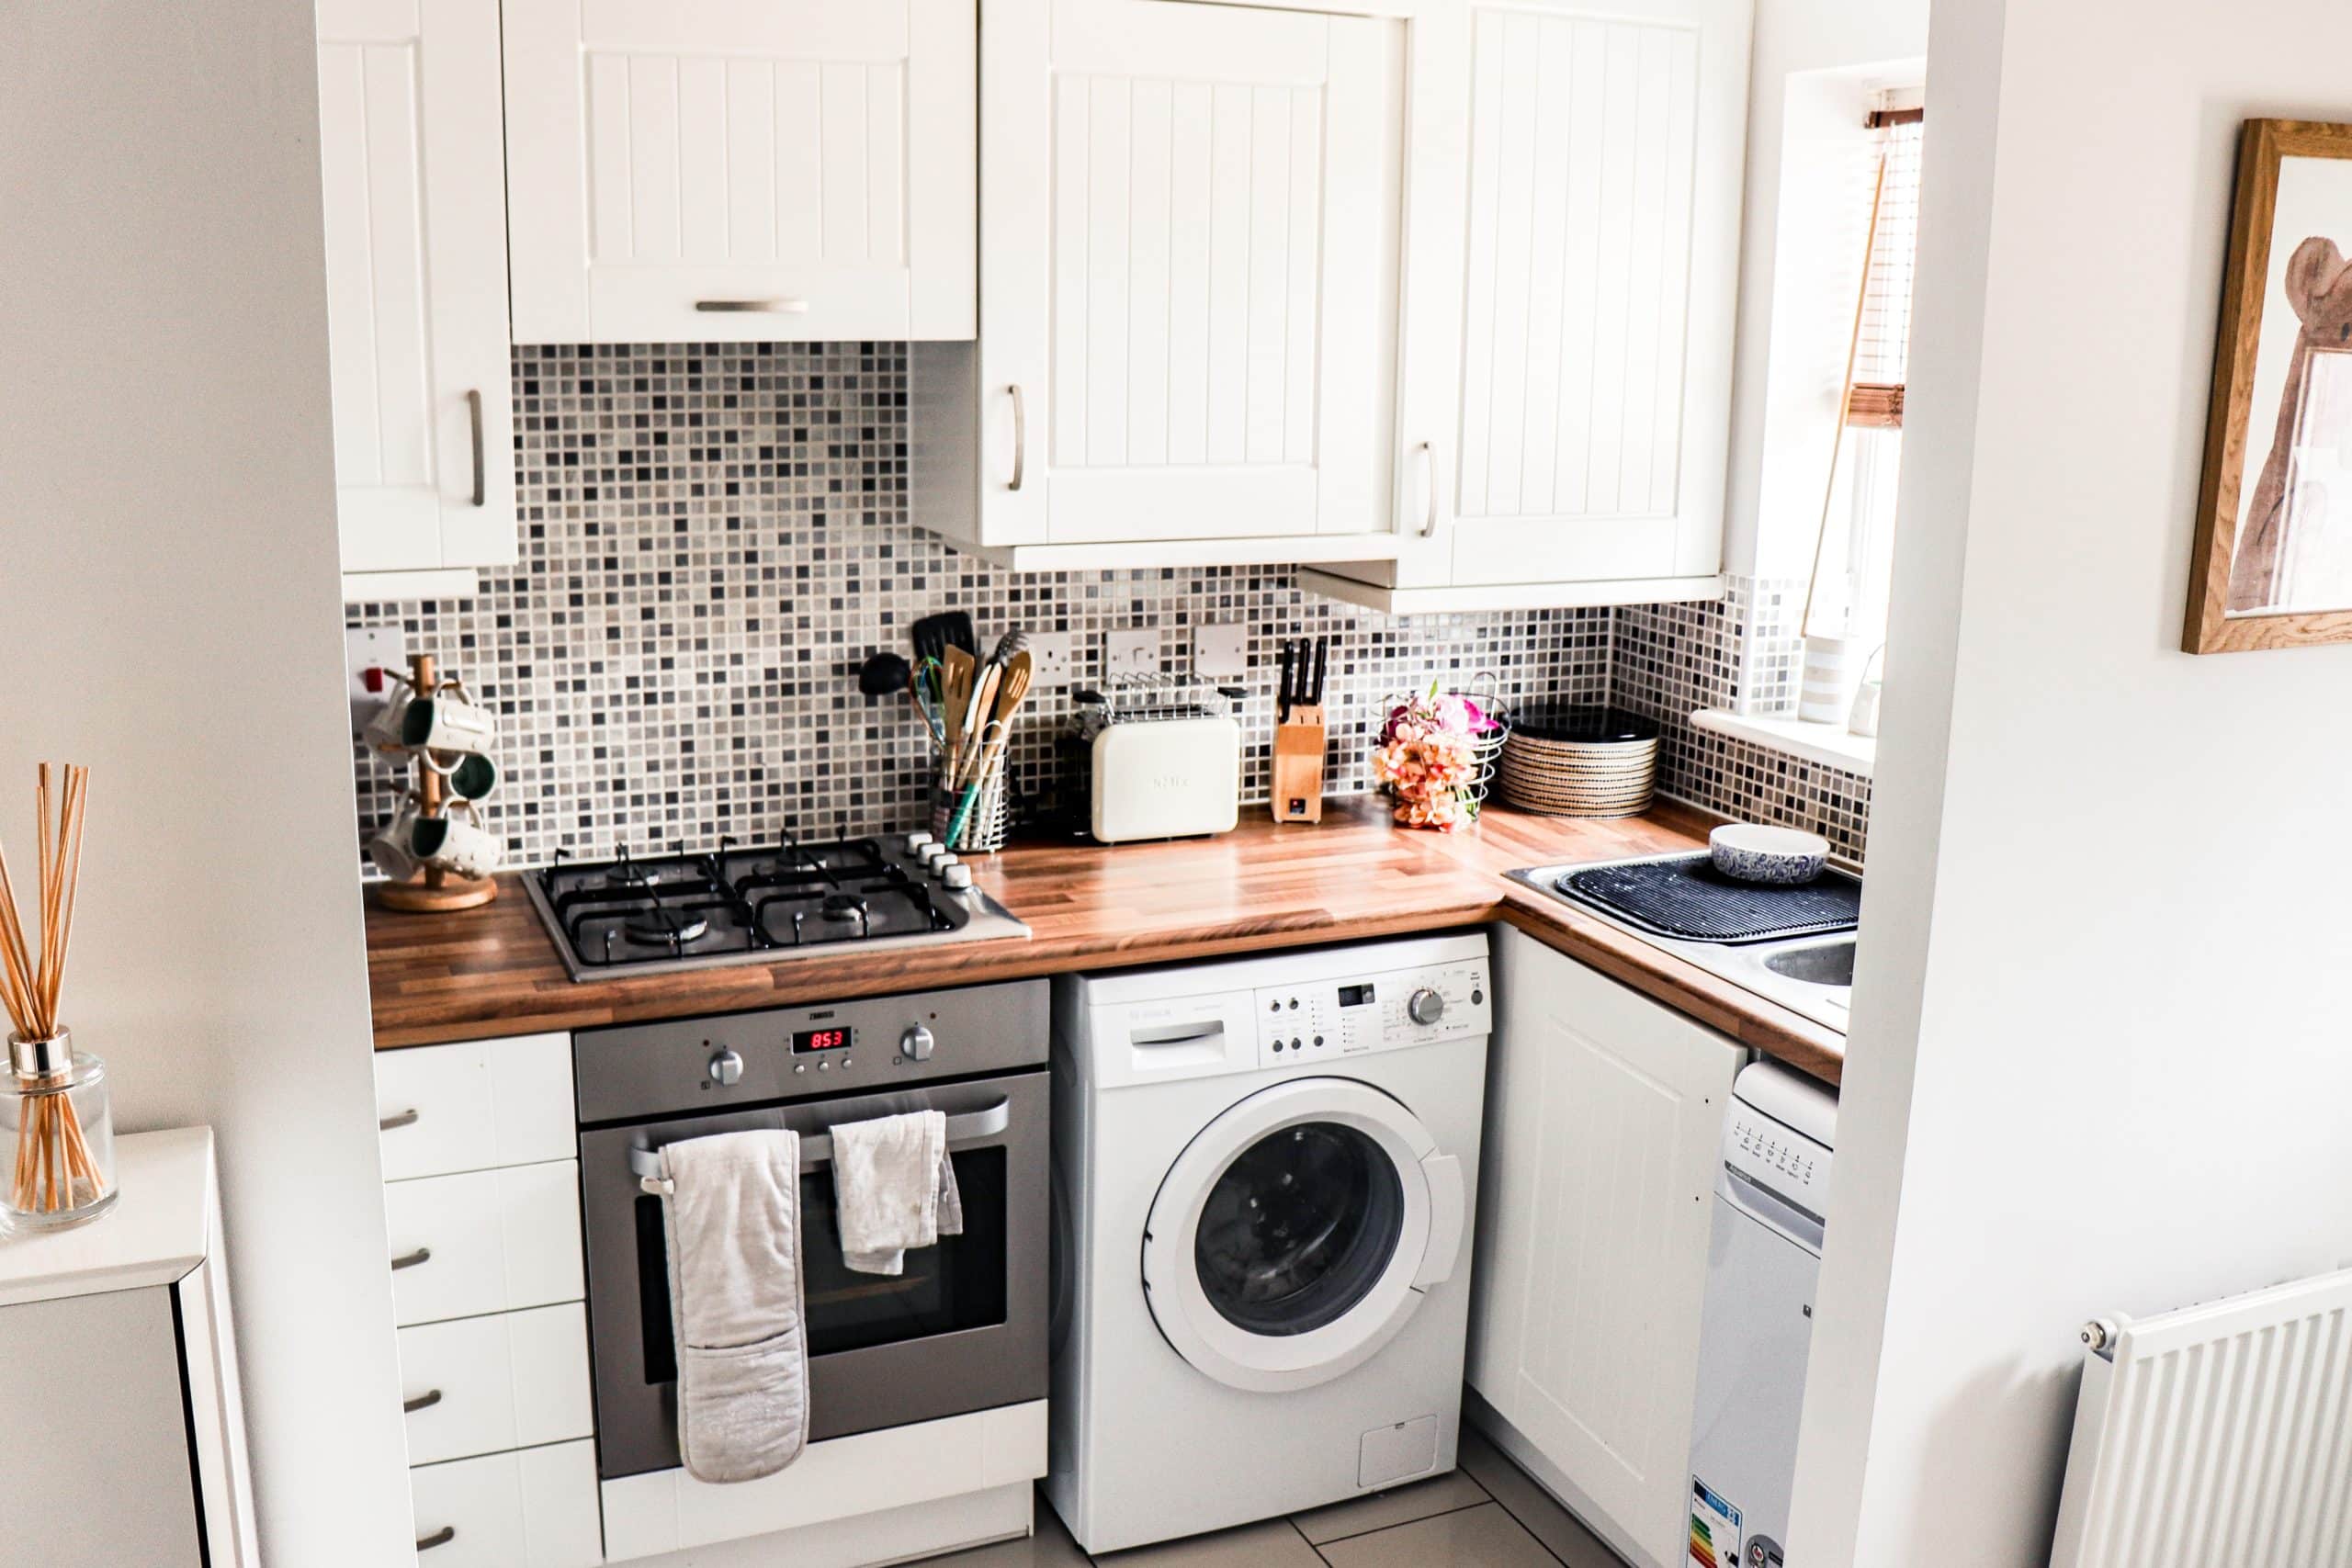
Compact Laundry Centers
When you have limited space, it’s essential to choose compact laundry appliances that fit seamlessly into your laundry room. Compact laundry centers combine a washer and dryer into one unit, saving valuable floor space. These units are designed specifically for small spaces, such as apartments, condos, or narrow laundry closets.
Compact laundry centers are available in both top-loading and front-loading options, giving you flexibility based on your preference. They come in various sizes, so be sure to measure your space carefully to ensure a proper fit.
In addition to saving space, compact laundry centers are also energy-efficient. They use less water and energy compared to traditional washer and dryer sets, helping you save on utility bills. Many compact models also offer a variety of wash and dry cycles, allowing you to customize the settings to suit your specific laundry needs.
Another advantage of compact laundry centers is their portability. If you live in a rental property or plan to move in the future, these units can easily be disconnected and relocated to your new space.
When shopping for a compact laundry center, consider models with built-in storage options. Some units have integrated shelves or cabinets above or below the washer and dryer, providing additional storage space for detergent, cleaning supplies, or laundry baskets.
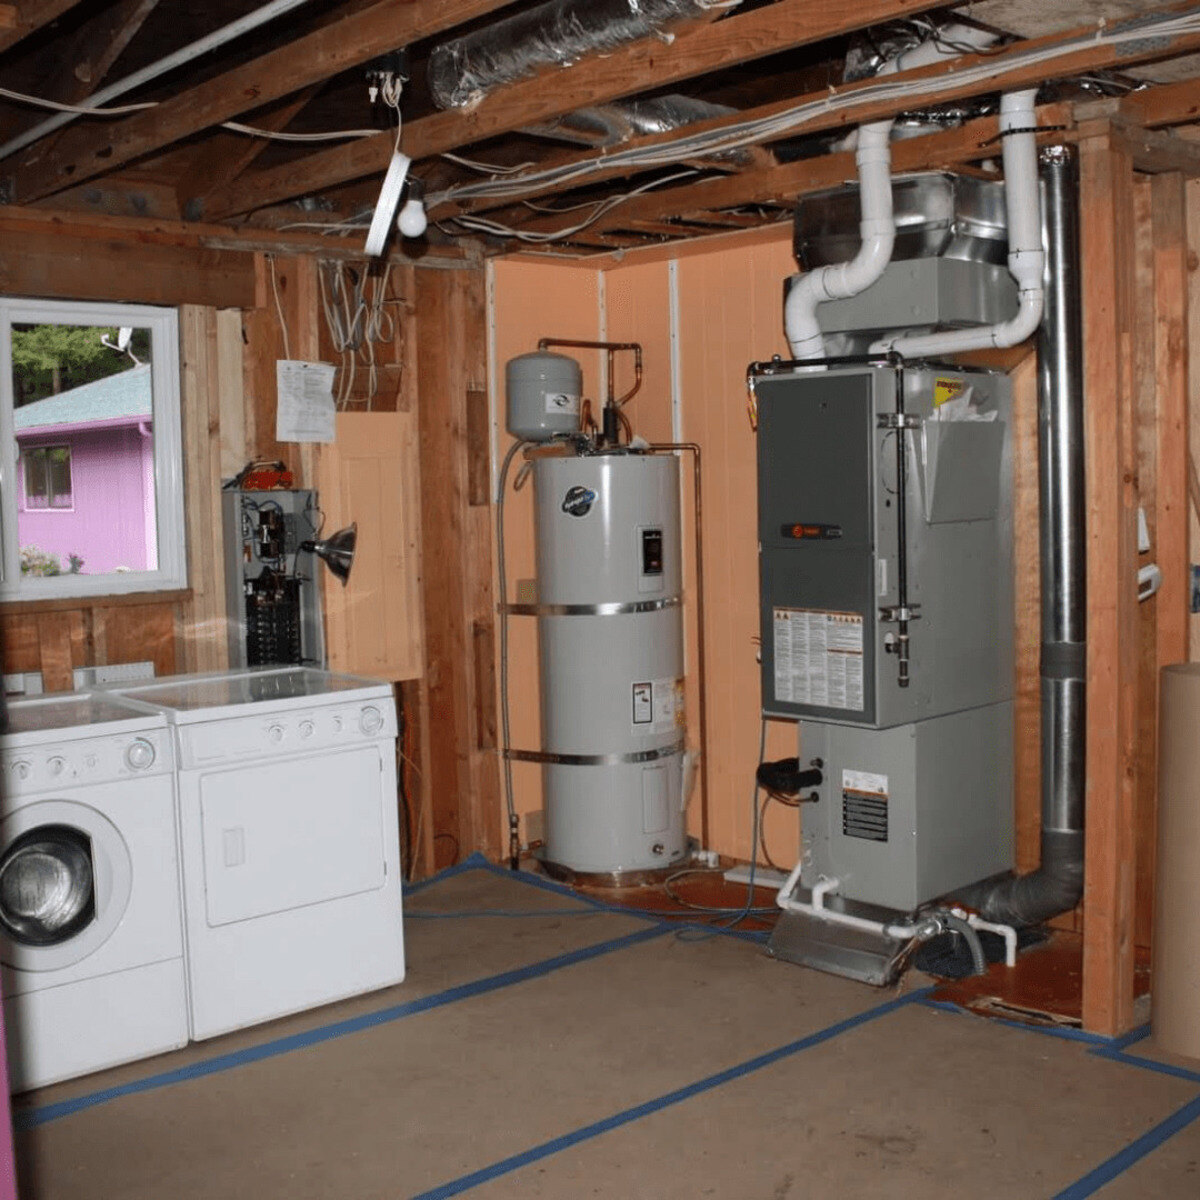
Remember to take ventilation into account when installing a compact laundry center. Proper airflow is crucial to ensure efficient drying and prevent mold or mildew growth. If your laundry closet doesn’t have adequate ventilation, you may need to consider installing a ventless dryer or venting system.
Compact laundry centers are an excellent solution for small laundry rooms, offering convenience, energy efficiency, and space-saving benefits. By choosing a compact unit, you can have a functional laundry setup without sacrificing precious square footage.
Sliding Doors for Space Optimization
Sliding doors are a smart choice for small laundry rooms as they help optimize space and provide a sleek and contemporary look. Unlike traditional swing doors that require additional clearance to open and close, sliding doors slide along a track, allowing for easy access without encroaching on the surrounding space.
One popular option is to use barn-style sliding doors. These doors feature a rustic, farmhouse-inspired aesthetic and are a stylish addition to any laundry room. They are available in various materials, such as wood or frosted glass, allowing you to choose the option that best suits your decor and personal style.
Sliding doors can also be used to conceal the laundry area when not in use, eliminating the visual clutter and creating a more organized and streamlined space. This is particularly useful if your laundry room is located in a multi-purpose area, such as a kitchen or hallway.
An alternative to barn-style doors is pocket doors. These doors slide into the wall cavity when opened, completely disappearing from view. Pocket doors are a fantastic space-saving option, as they don’t require any floor space or clearance for opening and closing.
When installing sliding doors, it’s important to ensure that the track is properly aligned and the doors slide smoothly. Opt for high-quality hardware to prevent any issues with the doors getting stuck or off-track. Additionally, consider adding soft-closing mechanisms to prevent slamming and minimize noise.
If you prefer a more modern and minimalist look, you can also consider using glass sliding doors. These doors allow natural light to flow through the laundry room, creating an open and airy feel. Frosted or opaque glass options provide privacy while still maintaining the illusion of space.
By incorporating sliding doors into your small laundry room, you can maximize space, create a visually appealing design element, and improve the overall functionality and flow of the room.
Fold-Out Ironing Board
In a small laundry room, finding space for an ironing board can be a challenge. However, a fold-out ironing board is a space-saving solution that can be easily incorporated into your laundry room design.
A fold-out ironing board is a compact ironing surface that is typically concealed within a cabinet or mounted on the wall. When you need to use it, simply unfold the board and secure it in place. When you’re done, fold it back up and tuck it away, saving valuable floor space.
There are different types of fold-out ironing boards available, including ones that fold down from a cabinet or drawer, or ones that fold out from the wall. Consider the layout and available space in your laundry room to determine which option would work best for you.
When choosing a fold-out ironing board, look for one with adjustable height settings to accommodate different users. Also, consider additional features such as built-in storage for your iron and other ironing accessories, allowing you to keep everything organized and within reach.
For added convenience, you can install a heat-resistant pad on the back of a laundry room door or on a nearby wall. This way, you can quickly iron garments without needing to set up the fold-out ironing board.
If you prefer not to use a dedicated fold-out ironing board, another space-saving option is using a tabletop ironing board. These smaller boards can be stored on a shelf or hung on a hook when not in use, taking up minimal space in your laundry room.
With a fold-out ironing board, you can have a dedicated ironing surface without sacrificing valuable floor space in your small laundry room. Say goodbye to bulky traditional ironing boards and hello to a more organized and efficient laundry routine.
Hidden Laundry Cabinets
If you want to keep your small laundry room looking clean and uncluttered, consider incorporating hidden laundry cabinets into your design. These cabinets are designed to conceal your washer and dryer behind closed doors, giving the room a sleek and seamless appearance.
Hidden laundry cabinets come in various styles, materials, and configurations, allowing you to choose the option that best suits your space and personal aesthetic. You can opt for full-height cabinets that extend from floor to ceiling or more compact cabinets that blend in with the rest of the room’s cabinetry.
In addition to hiding your appliances, these cabinets provide ample storage for detergent, fabric softener, and other laundry supplies. You can also use them to store cleaning products or even extra linens, maximizing the functionality of your laundry room.
When selecting hidden laundry cabinets, ensure that they are designed to accommodate your specific washer and dryer models. Consider the dimensions of your appliances and any additional space required for ventilation and maintenance.
For added convenience, choose cabinets that feature pull-out drawers or shelves for easy access to your laundry essentials. This will help you stay organized and make laundry tasks more efficient.
If you have limited floor space, opt for cabinets with fold-out or pull-down ironing boards, allowing you to make the most of every inch in your laundry room. You can also find hidden cabinets that include built-in hanging rods for drying clothes or storing freshly ironed garments.
One important consideration when installing hidden laundry cabinets is to ensure proper ventilation for your appliances. Adequate airflow will help prevent overheating and maintain the performance and longevity of your washer and dryer.
Hidden laundry cabinets offer a sleek and organized solution for small laundry rooms. With the appliances tucked away behind closed doors, you can enjoy a clean and streamlined space while still having easy access to all your laundry needs.
Wall-Mounted Drying Racks
A wall-mounted drying rack is a practical and space-saving solution for small laundry rooms. These racks can be easily installed on the wall, allowing you to air dry your clothes without taking up valuable floor space.
Wall-mounted drying racks come in a variety of styles and designs. Some feature retractable racks that can be extended when needed and folded away when not in use. Others consist of a series of rods or wires that can be mounted horizontally or vertically, providing ample space for hanging garments.
When selecting a wall-mounted drying rack, consider the amount of drying space you need and the available wall area in your laundry room. Measure the width and height of the wall to ensure the chosen rack will fit properly and allow for sufficient airflow between the hanging clothes.
For added convenience, look for drying racks that have adjustable or removable rods. This way, you can customize the rack to accommodate longer items such as pants or dresses, or remove specific rods to create more space for larger pieces.
When installing the drying rack, make sure it is securely attached to the wall to support the weight of wet clothes. Use appropriate mounting hardware and follow the manufacturer’s instructions for installation.
Wall-mounted drying racks also offer the advantage of versatility. In addition to laundry rooms, they can be installed in other areas of your home, such as bathrooms or utility rooms, providing extra drying space when needed.
If you prefer a more discreet option, you can consider installing a fold-down drying rack. These racks are mounted to the wall and can be folded up against it when not in use, providing a neat and compact solution.
Wall-mounted drying racks are not only practical, but they can also add a charming and rustic element to your laundry room. With clothes hanging on the racks, the result can be visually appealing, giving your laundry room a warm and inviting atmosphere.
By utilizing wall space for drying clothes, you can free up floor space and keep your small laundry room neat and organized. Say goodbye to bulky drying racks and hello to a more efficient and space-saving solution.
Overhead Storage Solutions
When it comes to utilizing every inch of space in a small laundry room, don’t forget about the often overlooked area above your head. Installing overhead storage solutions can provide valuable storage space for items that are not frequently used.
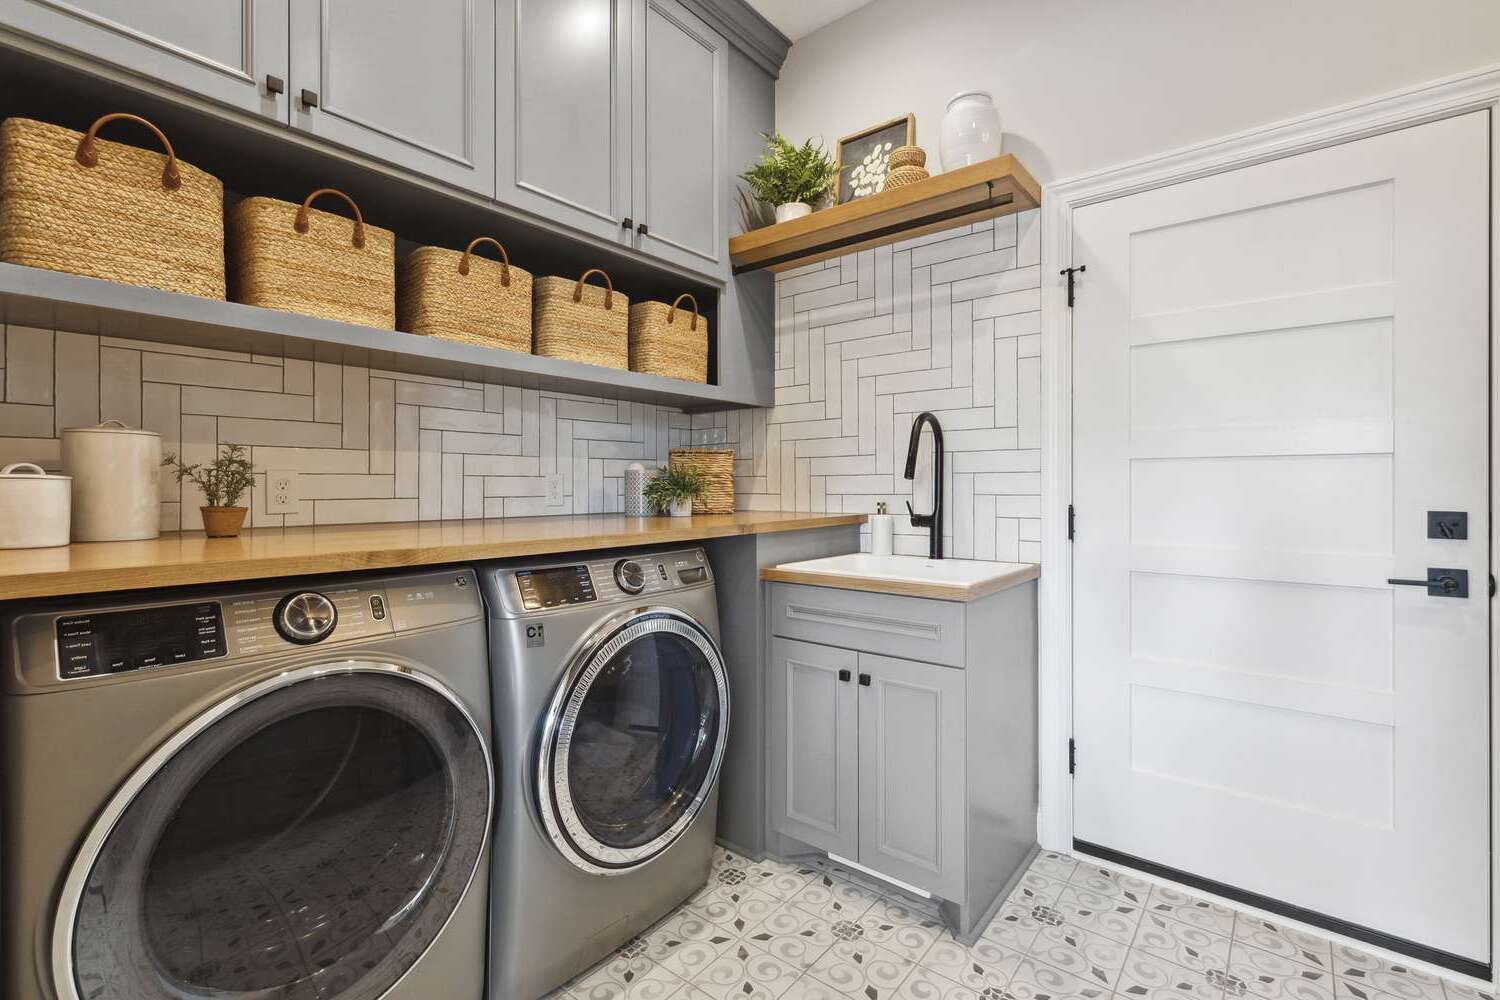
One popular option for overhead storage is to install shelving units above your washer and dryer. These shelves can hold baskets or bins to store items such as extra detergent, cleaning supplies, or even seasonal clothing items. Opt for shelves with adjustable heights to customize the spacing based on your storage needs.
If you prefer a more concealed storage solution, consider installing overhead cabinets. These cabinets can provide a clean and organized look, while hiding away items that you don’t want on display. Use them to store items like laundry baskets, linens, or even ironing supplies.
To maximize the storage potential, choose cabinets with built-in organizers or dividers. This will help you keep items sorted and easily accessible, making your laundry routine more efficient.
Another option for overhead storage is to install a hanging rod or rail. This can be useful for hanging freshly laundered clothes or garments that need to air dry. By using hooks or hangers, you can store items like drying racks, ironing boards, or even brooms and mops.
When installing overhead storage solutions, it’s important to ensure they are securely attached to the wall or ceiling for stability. Use appropriate hardware and follow the manufacturer’s instructions for installation.
Consider using labels or tags to identify the contents of the overhead storage. This will help you quickly locate items and maintain an organized space.
Utilizing overhead storage solutions in your small laundry room can make a significant difference in creating a more efficient and clutter-free space. By taking advantage of the vertical space above your head, you can maximize storage capabilities and keep the floor and countertop areas clear.
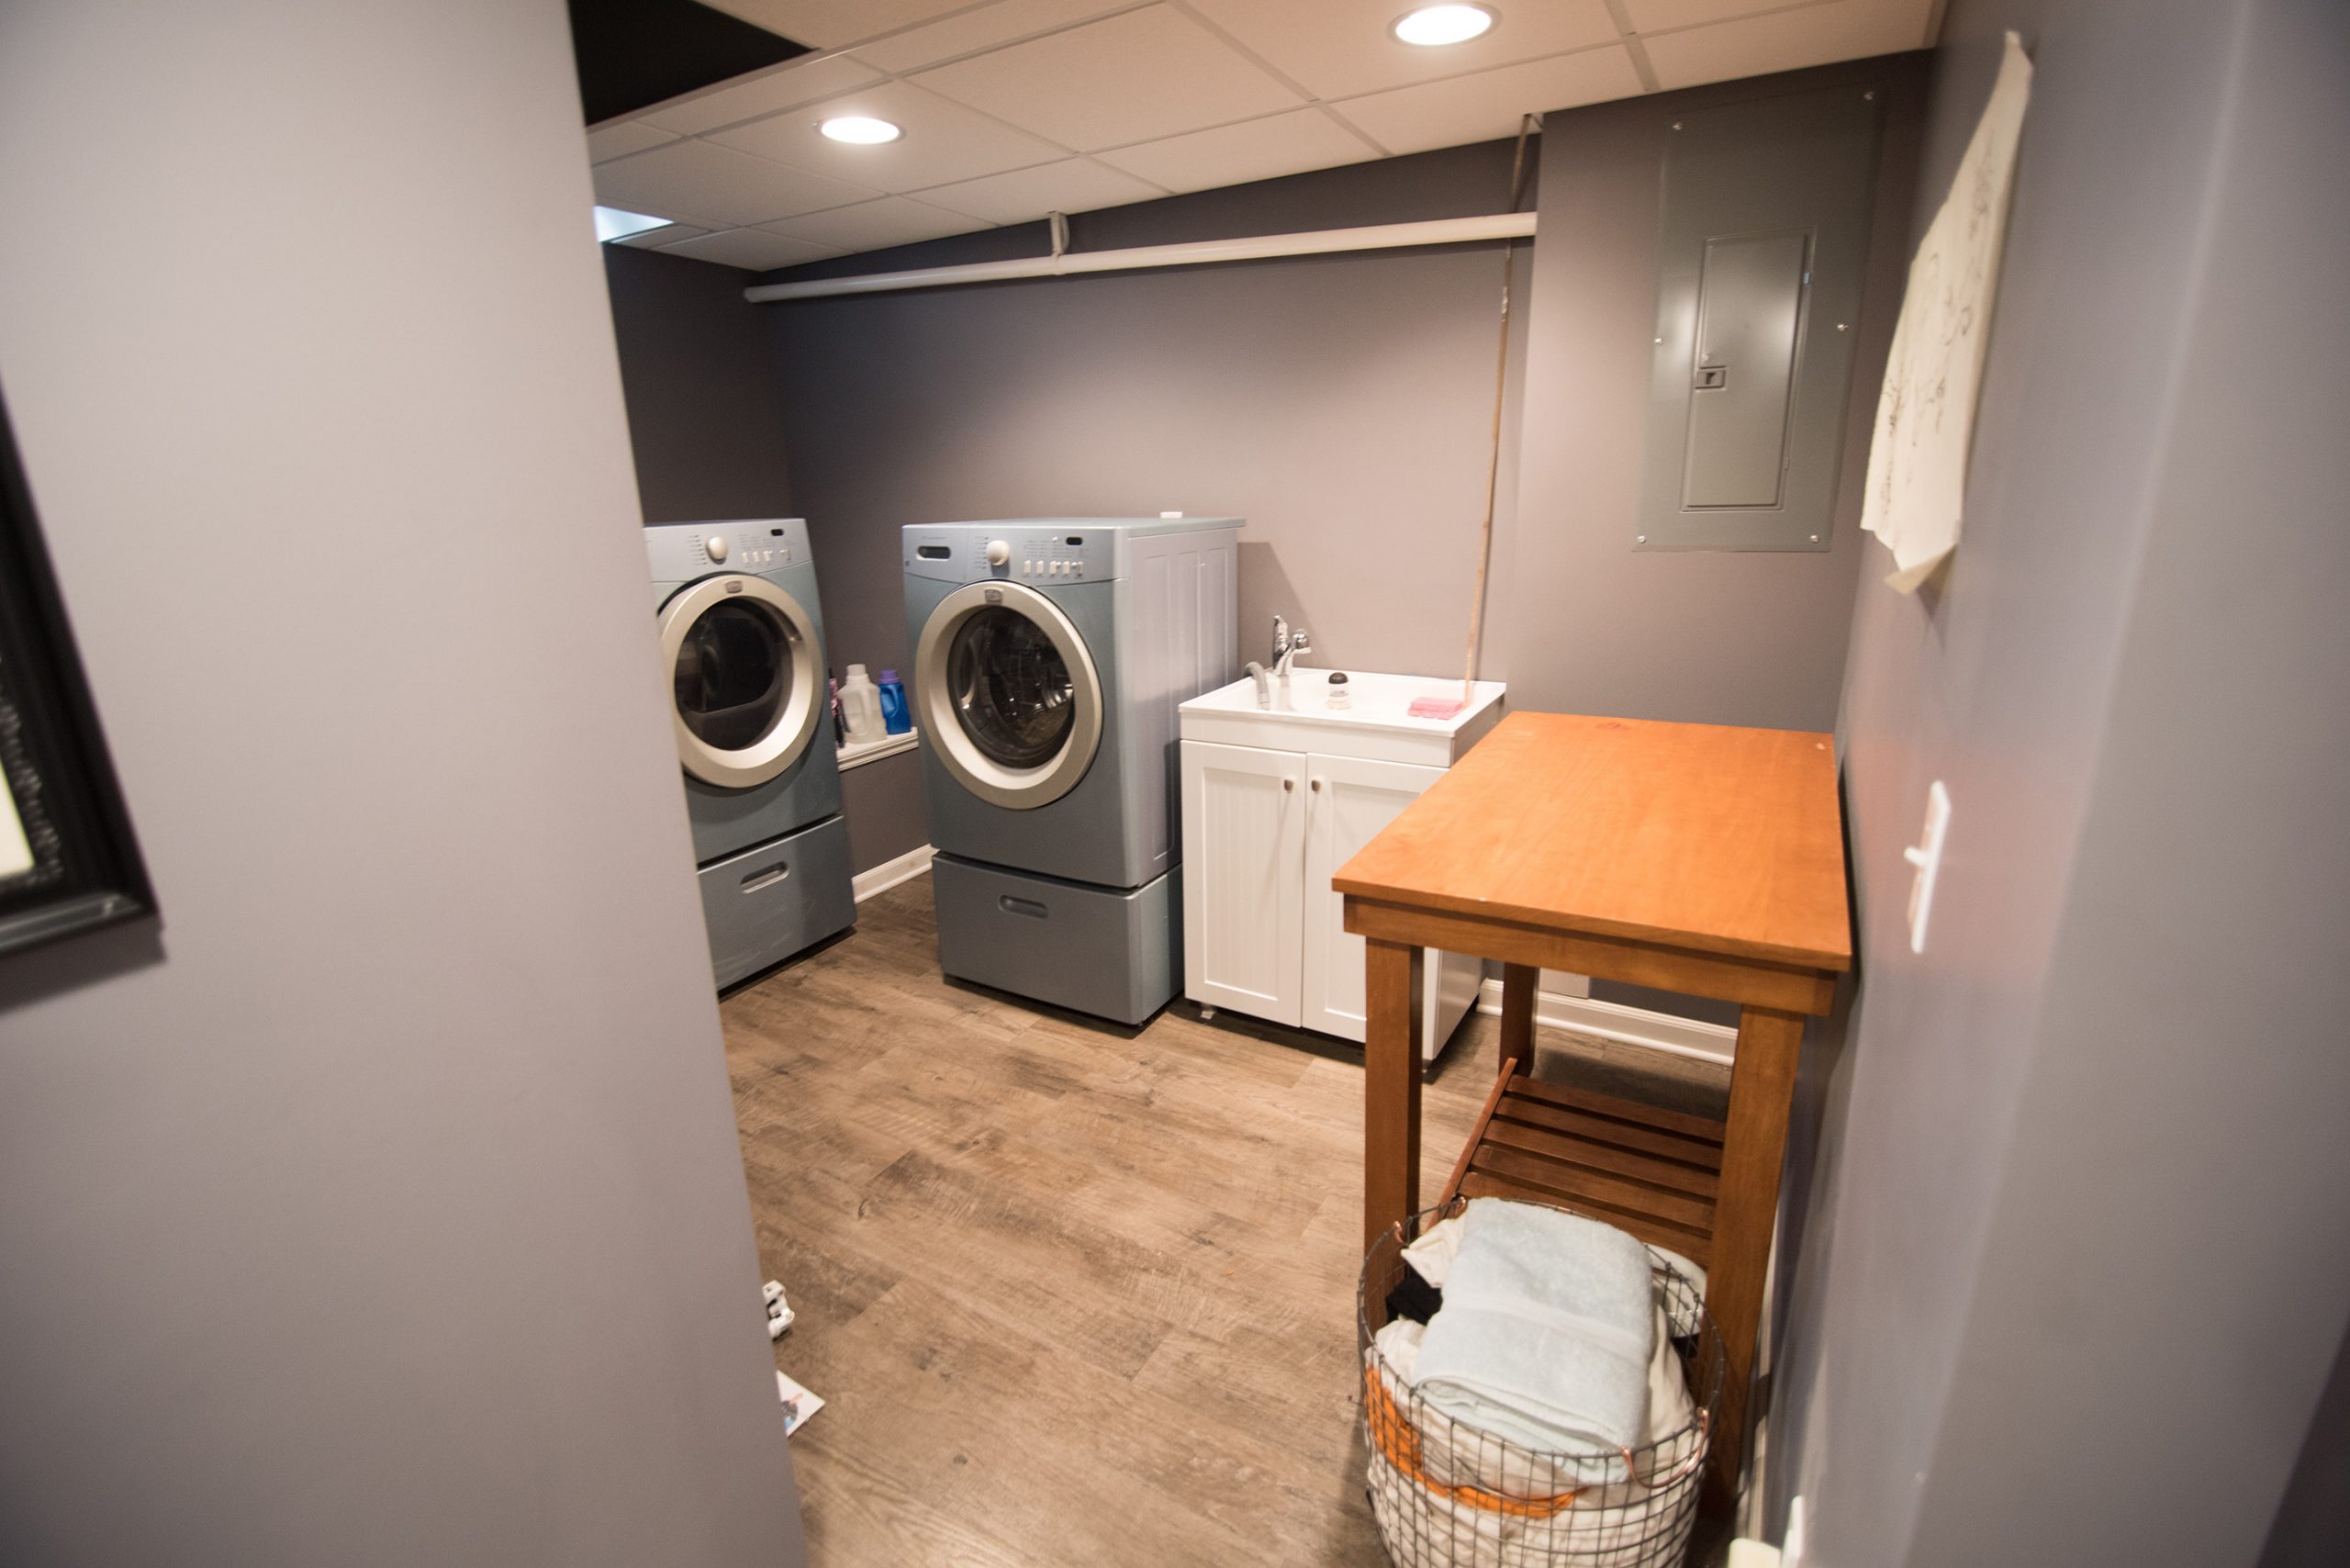
Stackable Washer and Dryer
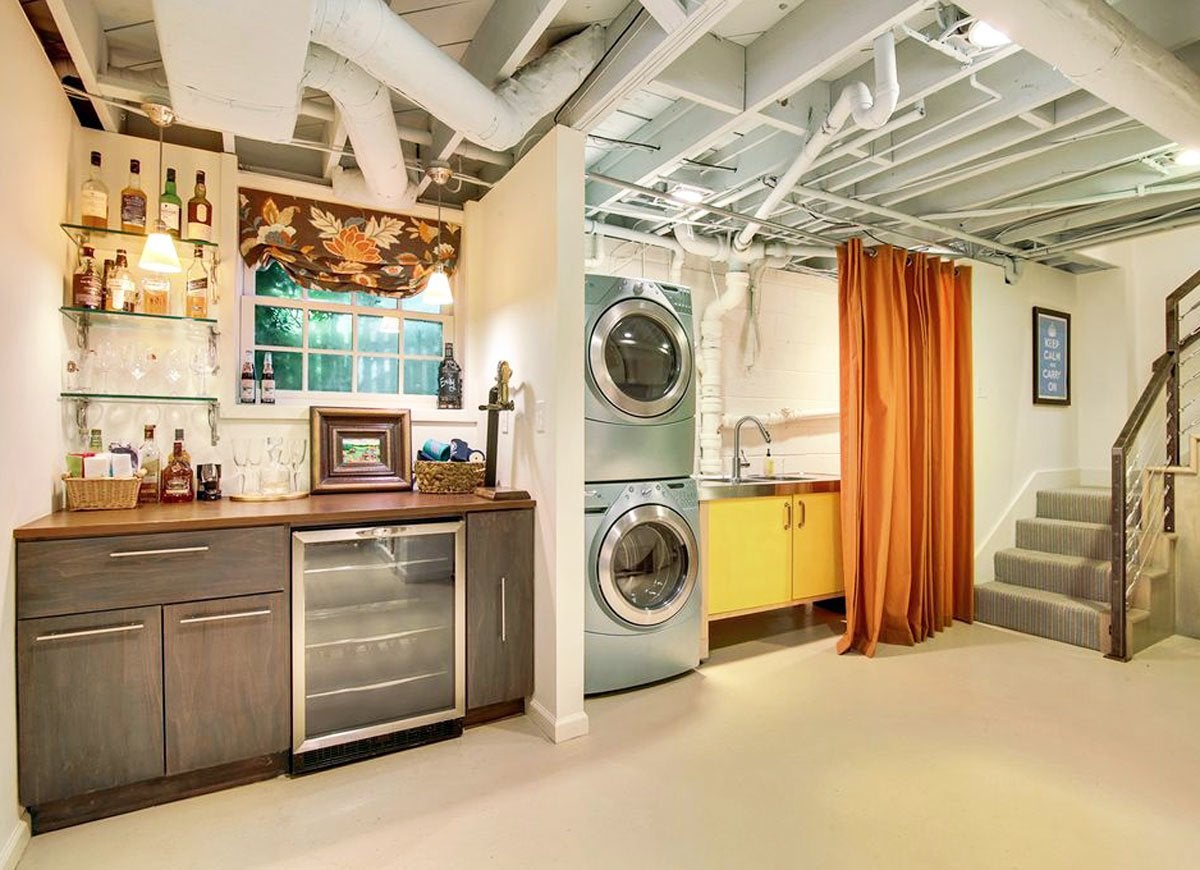
When it comes to small laundry rooms, one of the best space-saving solutions is to opt for a stackable washer and dryer. These appliances are designed to be vertically stacked on top of each other, allowing you to utilize floor space more efficiently.
Stackable washer and dryer sets are available in both front-loading and top-loading options, providing flexibility based on your preferences and space constraints. They come in various sizes, making it easier to find a set that fits your specific laundry room dimensions.
By stacking the washer and dryer, you free up valuable floor space, which can be utilized for other purposes, such as storage or additional countertop space. This is especially beneficial in small laundry rooms where every inch counts.
When considering a stackable washer and dryer, remember to measure the height of your space and ensure that the selected units will fit comfortably. Leave enough room for proper ventilation and access to controls and doors.
Keep in mind that some stackable sets may require a stacking kit, which is typically sold separately. This kit helps secure the appliances together, preventing any movement or instability during operation.
One advantage of stackable washer and dryer sets is that they are often more energy-efficient than traditional washer and dryer combinations. They use less water and energy, helping you save on utility bills while still providing excellent cleaning and drying performance.
Stackable laundry appliances also offer the convenience of having all your laundry needs in one compact area. The stacked configuration allows for seamless workflow, as you can easily move clothes from the washer to the dryer without having to bend or reach down.
When stacking your washer and dryer, be sure to follow the manufacturer’s guidelines and instructions to ensure proper installation and safety. This includes properly securing the units together and ensuring that the stack remains stable over time.
Choosing a stackable washer and dryer is a fantastic option for small laundry rooms. Not only does it save space, but it also provides the convenience of having all your laundry needs in one compact area, allowing you to create a functional and efficient laundry space.
Read more: What Is A Laundry Room
Laundry Nook Organization
If you have a laundry nook rather than a dedicated room, organization becomes even more critical to maximize the space. With proper planning and clever storage solutions, you can transform your laundry nook into an organized and efficient area.
Start by assessing your laundry nook and identifying the available space. Consider the walls, corners, and even the ceiling as potential storage areas. Every inch counts in a small space, so make use of every available surface.
Install wall-mounted shelves or cabinets above your washer and dryer to create vertical storage space. Use these shelves to store laundry supplies, such as detergent, fabric softener, or stain removers. Additionally, you can add baskets or bins on the shelves to keep smaller items organized.
Utilize the space under your washer and dryer by placing rolling carts or bins. These can be used to store items like cleaning supplies, spare laundry detergent, or even spare towels or linens. Having a portable storage solution allows you to easily access the items when needed and tuck them away when not in use.
If your laundry nook has a countertop or a folding station, maximize its functionality by incorporating built-in drawers or organizers. These can be used to store laundry essentials, such as dryer sheets, clothespins, or lint rollers. Consider adding dividers or compartments to keep smaller items neatly organized and easily accessible.
Make use of the walls or back of the laundry nook door by adding hanging storage solutions. Install hooks or over-the-door organizers to hold items like ironing boards, hangers, or even laundry bags. This keeps these items off the floor and saves valuable space within the nook.
Labeling is key to maintain an organized laundry nook. Consider using labels or tags on shelves and bins to clearly identify the contents. This will help you quickly locate items and ensure everything has its designated place.
Finally, keeping your laundry nook clean and decluttered is essential. Regularly go through the shelves and storage areas to remove any items that are expired or no longer needed. This will create a more efficient and visually appealing space.
By implementing these organization tips, you can transform your laundry nook into a well-organized and functional area. With everything in its place and easily accessible, doing laundry will become a breeze, even in the smallest of spaces.
Multipurpose Furniture
In a small laundry room, every piece of furniture should serve a purpose and maximize the use of limited space. This is where multipurpose furniture comes into play. By investing in furniture that serves multiple functions, you can save space and improve the overall functionality of your laundry room.
One example of multipurpose furniture is a laundry hamper with built-in storage. These hampers not only provide a convenient place to hold dirty clothes but also feature compartments or shelves for organizing laundry supplies. This eliminates the need for separate storage units and keeps everything within arms reach.
Another option is to invest in a folding table that doubles as a drying rack. These tables have a top surface that can be used as a workspace or can be folded down to create a drying rack for delicate items. This is a practical solution for small laundry rooms that lack space for a separate table and drying rack.
Consider furniture pieces with hidden storage compartments. For example, an ottoman or bench with a removable top can be used to store laundry essentials, such as extra detergent, cleaning supplies, or even spare towels. This not only provides a functional seating option but also keeps your laundry room organized and clutter-free.
Wall-mounted fold-down ironing boards, as mentioned earlier, can be considered multipurpose furniture. These foldable ironing boards can be installed on the wall and can be used as a flat surface for folding clothes or as a compact ironing station. When not in use, they can be folded up, taking up minimal space.
If your laundry room also serves as a mudroom or entryway, opt for furniture pieces that can do double duty. For example, a bench with storage underneath can be used to store shoes, while also providing a seating area when putting on or taking off footwear. This way, you can maximize the use of the space for multiple purposes.
When selecting multipurpose furniture, consider the dimensions and scale of your laundry room. Choose pieces that are proportionate and do not overwhelm the space. Opt for furniture with clean lines and a minimalist design to create an uncluttered and visually appealing environment.
Multipurpose furniture is a great investment for small laundry rooms, as it allows you to make the most of limited space while providing the necessary functionality and storage. With these versatile furniture pieces, you can create a laundry room that meets multiple needs and enhances the overall efficiency of the space.
Consider using stackable washer and dryer units to maximize space in a small laundry room. This will free up floor space for other storage or functional purposes.
Creative Sorting and Storage Solutions
Effective sorting and storage are essential in any laundry room, especially in small spaces where organization is key. With some creative solutions, you can streamline your sorting process and optimize storage to make the most of your small laundry room.
One innovative idea is to use color-coded laundry baskets or bins for sorting. Assign a different color to each family member or specific laundry categories, such as whites, colors, or delicates. This not only makes sorting easier but also adds a visual element to your laundry routine.
Consider installing a pull-out sorting system within a cabinet or underneath a countertop. This system provides separate compartments for different types of laundry, allowing you to easily sort clothes as you go. When it’s time to do laundry, simply pull out the compartments and transport them to the washer.
Wall-mounted pegboards can also be an effective storage and sorting solution. Install hooks or bins on the pegboard to store items such as hangers, lint rollers, and small laundry accessories. You can even hang labeled bags for sorting and storing socks or other small items.
Another creative option is to repurpose an old bookshelf or shelving unit for laundry storage. Use baskets or bins to hold laundry supplies, folded towels, or even extra hangers. Utilize the shelves to display decorative elements or incorporate storage boxes to keep the area organized.
For small laundry rooms without built-in cabinets, adjustable wire shelving units are a practical solution. These units often come with customizable configurations, allowing you to adapt them to your specific storage needs. Use baskets or bins to keep small items organized, and utilize the shelves for larger items, such as bulk detergent containers or extra towels.
Don’t forget about the space above your washer and dryer. Install a floating shelf or wall-mounted cabinet to store frequently used laundry supplies, freeing up valuable countertop space. Use labeled jars or containers to hold small items and add a decorative touch to the space.
If your laundry room has limited floor space, look for storage solutions that can be mounted on the walls or doors. This includes wall-mounted drying racks, hooks for hanging laundry bags or ironing boards, and door organizers for storing cleaning supplies or lint rollers.
Ultimately, the key to creative sorting and storage solutions is to think outside the box and make the most of every nook and cranny in your small laundry room. By utilizing innovative storage options and implementing efficient sorting systems, you’ll create a more organized and functional space.
Corner Laundry Room Designs
Corner spaces in a room are often overlooked, but they can be a valuable area to create a functional and efficient laundry room, especially in small spaces. With some creative design ideas, you can utilize the corners of your laundry room to their full potential.
One option is to install corner shelves or cabinets. These triangular shelving units are specifically designed to fit into corners, providing additional storage space without taking up much room. Use them to store laundry supplies, folded towels, or even decorative elements to add a touch of style to the corner.
If you have a washer and dryer in a corner nook, consider installing a countertop or a collapsible table that spans the two walls. This provides a convenient surface for folding clothes or sorting laundry. When not in use, simply fold down the table or countertop to maintain a compact and uncluttered space.
An alternative option for corner laundry room designs is to create a built-in or custom-made corner cabinet. This cabinet can house your washer and dryer, along with additional storage space for laundry supplies. It can also incorporate a folding station or pull-out drawers to maximize functionality.
If you prefer a more open and airy design, consider using the corner as a dedicated drying area. Install a retractable clothesline or a wall-mounted drying rack that extends diagonally across the corner. This allows you to hang garments or linens to air dry without obstructing the flow of the room.
Lighting is key in corner laundry room designs. To ensure visibility and eliminate shadows, install overhead lighting in the corner or use wall-mounted light fixtures. This will make the corner feel well-lit and enhance the overall functionality of the space.
When working with a corner laundry room, it’s important to optimize vertical space. Utilize wall-mounted shelves, hanging rods, or overhead cabinets to make the most of the available height. This will allow you to store items vertically and free up floor space.
Lastly, don’t forget about the aesthetics of the corner. Incorporate decorative elements such as plants, colorful storage bins, or artwork to add personality and make the corner visually appealing. This will transform the corner from an overlooked area into a stylish and functional part of your laundry room.
By thinking creatively and maximizing the potential of corner spaces, you can design a practical and efficient laundry room. Embrace the corners of your laundry room and transform them into functional and visually appealing areas that make laundry tasks a breeze.
Read more: How Big Should A Laundry Room Be
Open Shelving Ideas
Open shelving is a popular choice for small laundry rooms as it offers both functionality and a visually appealing design element. With open shelving, you can create storage space for your laundry essentials while also showcasing decorative items. Here are some ideas to inspire your open shelving design:
1. Floating Shelves: Install floating shelves on the walls of your laundry room. These sleek and minimalist shelves provide a clean and open storage solution. Use them to display folded towels, decorative jars, or potted plants to add a touch of style to your laundry room.
2. Wire Shelving: Consider wire shelving for a more industrial look. These shelves are lightweight, adjustable, and allow for proper ventilation. Use them to store laundry baskets, cleaning supplies, and other utility items. You can also hang hooks below the shelves to hang hangers or small laundry accessories.
3. Ladder Shelving: Repurpose an old ladder as open shelving in your laundry room. Lean it against the wall and attach boards or planks to create shelves. This unique and rustic shelving option provides a perfect spot to display folded clothes, laundry baskets, or decorative storage boxes.
4. Cubby Shelves: Install cubby shelves with multiple compartments. These divided shelves are ideal for storing and organizing laundry essentials like detergent, fabric softener, and dryer sheets. You can also label each cubby to make it easy to find and access specific items.
5. Baskets and Bins: Place woven baskets or fabric bins on the open shelves to hide smaller items and create a more organized look. Use different-sized baskets to store miscellaneous items such as socks, rags, or lint rollers. Label the baskets to quickly identify their contents.
6. Glass Jars: Opt for glass jars or containers to store items like laundry pods, clothespins, or buttons. Not only do these containers keep your supplies organized, but they also add a decorative touch. Consider adding labels to the jars for a clean and organized look.
7. Colorful Display: If you want to add a pop of color to your laundry room, utilize the open shelves to display brightly colored storage boxes, folded linens, or laundry baskets. Coordinate the colors with the overall theme of your laundry room to create a cohesive and visually appealing space.
8. Open Hanging Rod: Install an open hanging rod below the open shelves to hang freshly ironed clothes or items that need to air dry. This provides a functional storage solution while also keeping clothes wrinkle-free and readily accessible.
When arranging items on open shelves, remember to keep them neat and organized. Avoid overcrowding the shelves and leave some space between items for a more visually pleasing display. Regularly declutter and rearrange the items to maintain an organized and clutter-free look.
Open shelving not only provides practical storage space in your small laundry room, but it also allows you to showcase your personal style and creativity. With these open shelving ideas, you can transform your laundry room into a functional and visually appealing space.
Hanging Laundry Baskets
If you have limited floor space in your small laundry room, hanging laundry baskets can be a game-changer. These space-saving solutions not only keep your laundry organized but also add an interesting visual element to the room. Here are some ideas for incorporating hanging laundry baskets:
1. Wall-Mounted Baskets: Install wall-mounted baskets directly on the wall or hang them from hooks. This allows you to easily separate and sort your laundry while keeping the floor clear. You can label the baskets to designate specific laundry categories like whites, colors, or delicates.
2. Ceiling-Mounted Pulley System: Create a pulley system from the ceiling to hang multiple laundry baskets. This is a great option if you have high ceilings in your laundry room. Use ropes or chains to suspend the baskets, and you can lower them for easy access and lift them back up when not in use, maximizing the available space.
3. Over-the-Door Baskets: Utilize the back of your laundry room door by hanging over-the-door baskets. These baskets can hold smaller items like socks or accessories. The clear pockets or compartments make it easy to see what’s inside, saving you time when sorting and folding laundry.
4. Hanging Basket Rack: Install a hanging basket rack that attaches to the wall or hangs from the ceiling. These racks typically have multiple levels of suspended baskets, allowing you to sort clothes by type or family member. This setup provides a functional storage solution and adds a unique focal point to your laundry room.
5. Drawer or Shelf Dividers: If you have existing drawers or shelves in your laundry room, consider adding dividers or hanging organizers inside to create separate compartments. This allows you to store smaller laundry items like underwear or socks neatly and prevents them from getting mixed up. Choose dividers that can be easily adjusted to accommodate different sizes of clothing.
When using hanging laundry baskets, it’s important to ensure the baskets are securely attached to the wall or ceiling. Use appropriate hardware and follow the manufacturer’s instructions for installation. Regularly check the stability of the baskets to ensure they can safely support the weight of your laundry.
Opting for hanging laundry baskets not only frees up floor space but also encourages efficient laundry sorting and storage. With these creative hanging solutions, you can maximize the functionality of your small laundry room while adding an interesting and practical design element.
Under Cabinet Lighting
Under cabinet lighting is a simple yet effective way to enhance the functionality and ambiance of your small laundry room. By installing lights underneath your cabinets, you can illuminate the workspace and create a more pleasant and inviting atmosphere. Here’s why under cabinet lighting is a great addition to your laundry room:
1. Increased Visibility: Good lighting is essential when performing tasks in the laundry room, such as sorting clothes or folding laundry. Under cabinet lighting provides focused illumination directly onto the countertop or work area, ensuring that you have clear visibility and can work with ease. No more struggling with shadows or dimly lit corners!
2. Task Lighting: Under cabinet lighting serves as task lighting, specifically designed to illuminate the area where you perform laundry-related duties. It provides focused and bright light where you need it most, such as over the folding station or near the sink. This helps reduce eye strain and ensures you can work efficiently and comfortably.
3. Ambient Lighting: In addition to its functional benefits, under cabinet lighting also enhances the overall ambiance of your laundry room. The soft, warm glow from the lighting creates a cozy and inviting atmosphere, making your laundry room a more pleasant space to work in.
4. Highlighting Decorative Elements: If you have decorative elements in your laundry room, such as colorful storage bins or artwork, under cabinet lighting can be used to highlight these elements. The subtle lighting draws attention to these features, adding visual interest and making your laundry room feel more stylish and personalized.
5. Energy Efficiency: LED under cabinet lighting is an energy-efficient option. LED lights consume less energy than traditional incandescent bulbs, helping you reduce your energy consumption and lower your utility bills. Additionally, LED lights have a longer lifespan, so you won’t have to worry about frequent bulb replacements.
6. Easy Installation: Under cabinet lighting is relatively easy to install, even for DIY enthusiasts. You can find various options, including adhesive light strips or puck lights that can be easily mounted underneath the cabinets. Many options are battery-powered or plug-in, eliminating the need for complex electrical work.
When selecting under cabinet lighting, choose lights with a color temperature that suits your preferences. Cool white or daylight options can provide bright and crisp lighting, while warm white options can create a cozier feel. Consider dimmable lights to have more control over the brightness in your laundry room.
Incorporating under cabinet lighting in your small laundry room can significantly improve its functionality and ambiance. Enjoy enhanced visibility, a more enjoyable work environment, and a stylish touch with the addition of under cabinet lighting in your laundry room!
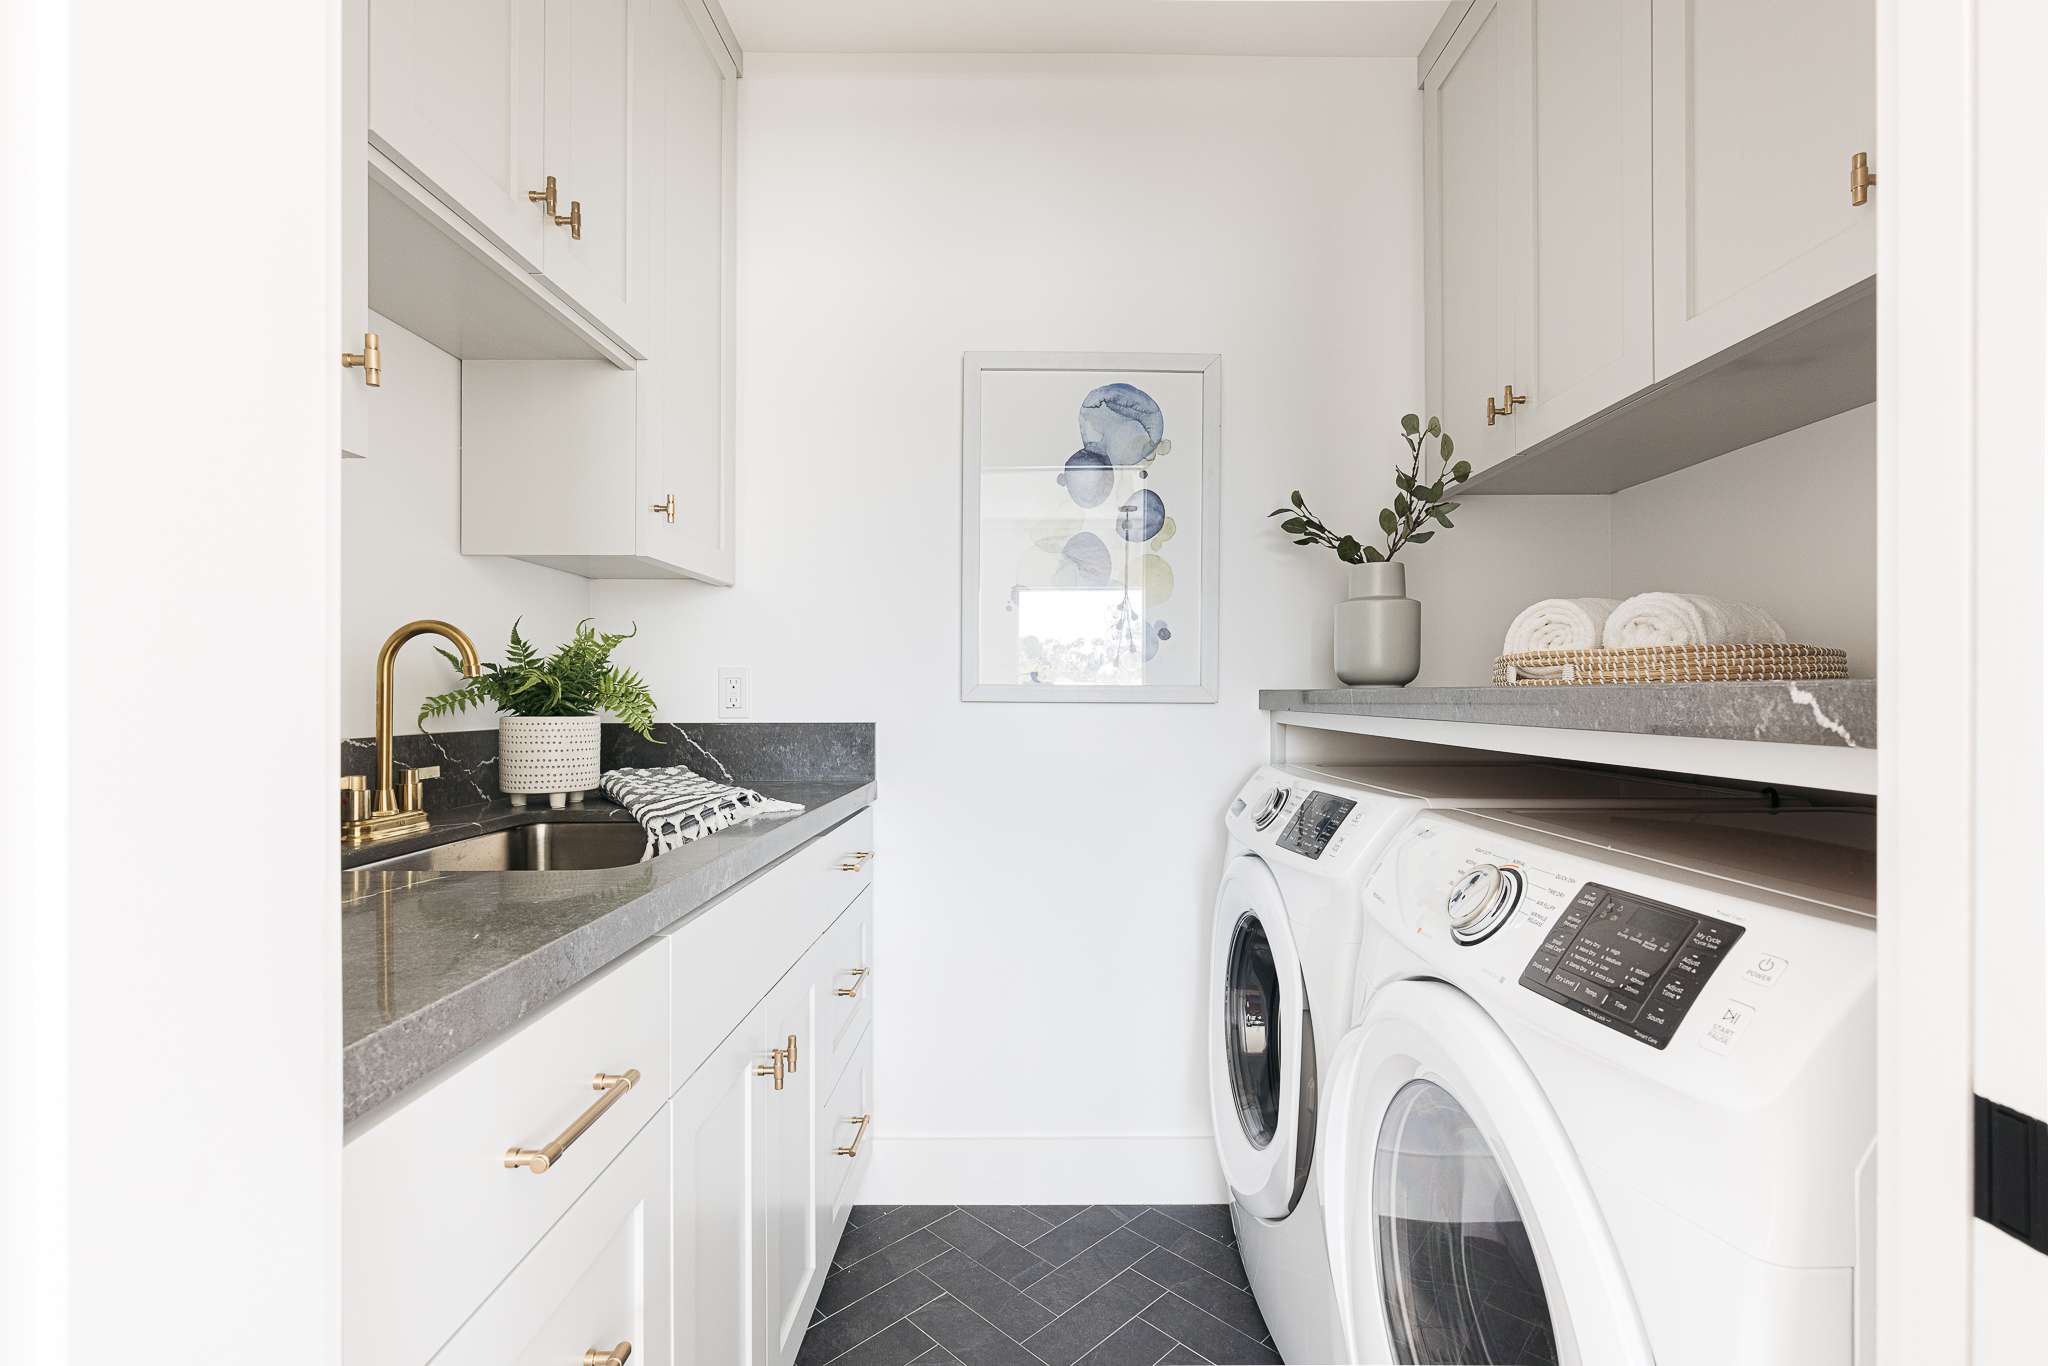
Utilizing Narrow Spaces
In a small laundry room, utilizing every inch of available space is essential, including narrow or awkwardly shaped areas. With some creative thinking and smart design choices, you can turn these narrow spaces into functional and efficient storage solutions. Here are some ideas for making the most of narrow spaces in your laundry room:
1. Slim Storage Cabinets: Invest in tall and narrow storage cabinets that can fit into tight corners or narrow spaces. These cabinets provide vertical storage for laundry essentials, such as detergent, fabric softener, and cleaning supplies. Look for slim cabinet options with shelves or drawers to maximize storage opportunities.
2. Sliding Shelves or Drawers: Install sliding shelves or drawers in narrow gaps, such as between the washer and dryer or beside other appliances or cabinets. These sliding mechanisms allow you to easily access items stored in deep spaces. Use them for storing laundry baskets, cleaning supplies, or even recycling bins.
3. Wall-Mounted Pegboards: Hang a pegboard on narrow wall spaces to create additional storage opportunities. Install hooks or shelves on the pegboard to hold items like hangars, ironing boards, or even small baskets for organizing lint rollers and other laundry accessories.
4. Fold-Down Drying Racks: In narrow hallways or tight spaces, consider installing fold-down drying racks. These racks can be mounted on the wall and extended when needed to hang clothes or delicate items to air dry. When not in use, simply fold them back up, creating more space in your laundry room.
5. Bag or Bin Storage: Hang fabric or mesh bags, or mount wire baskets on the walls of narrow spaces. These can be used to store oddly shaped items, such as vacuum attachments, spare hoses, or even single socks waiting for their mates to be found. Consider labeling the bags or baskets for easy identification.
6. Over-the-Door Solutions: Make use of the back of the laundry room door or other narrow doors by attaching over-the-door organizers or hooks. These organizers can hold small items like stain removers, fabric fresheners, or lint rollers. Utilize the vertical space and keep frequently used items within arm’s reach.
7. Pull-Out Ironing Board: If you have a narrow space between cabinets or appliances, consider installing a pull-out ironing board. These hidden boards can be easily extended when needed for ironing and folded back into their concealed space when not in use, saving valuable space in your laundry room.
8. Customized Shelving: For extremely narrow spaces, consider building custom shelves that fit the specific measurements. These shelves can be made to fit into tight gaps and provide storage for smaller laundry essentials or decorative elements.
Remember to consider the dimensions and accessibility of the narrow spaces when implementing these ideas. Always ensure that the storage solutions are installed securely and can easily accommodate the items you plan to store.
With some creative planning and resourceful thinking, you can transform narrow or awkward spaces in your small laundry room into functional and efficient storage areas. Take advantage of every nook and cranny to create an organized and well-utilized laundry room.
Read more: How To Add A Laundry Room
Compact Folding Stations
A dedicated folding station is a game-changer in any laundry room. Even in small spaces, you can create a compact folding station that provides a designated area for folding clothes. Here are some ideas to design a practical and space-saving folding station:
1. Wall-Mounted Drop-Leaf Table: Consider installing a wall-mounted drop-leaf table as your folding station. This space-saving solution can be folded down when not in use to save space. When you need to fold laundry, simply unfold the table and use it as a flat surface. Opt for a table with additional shelves or drawers for storing folding supplies.
2. Pull-Out Countertop: Install a pull-out countertop surface that can be extended when needed. This feature is especially useful when paired with front-loading machines that can double as an extended workspace. When you’re finished folding, simply slide the countertop back into its designated space to free up floor space.
3. Folding Station in a Drawer: If you have a spare drawer in your laundry room, consider converting it into a folding station. Use dividers or organizers within the drawer to create sections for different types of clothing or to keep your folding supplies neatly arranged. When not in use, close the drawer to maintain a clutter-free look.
4. Fold-Down Wall-Mounted Table: Install a fold-down table that attaches to the wall. These tables can be easily folded up and down, providing a flat surface for folding clothes when needed. Choose a design that allows you to lock the table in place when folded down to ensure stability.
5. Custom-Built Foldable Countertop: If you have a narrow wall or space between cabinets, consider building a custom foldable countertop. This countertop can be designed to fold up and down, creating a functional folding area that can be tucked away when not in use, maximizing your available space.
6. Over-the-Washer Folding Shelf: Utilize the top of your washer or dryer by adding a folding shelf or board. This creates an instant folding surface that can be easily removed when you need to access the appliances. Look for folding shelves that are lightweight and easy to install, ensuring that they are secure atop the machines.
7. Mobile Folding Cart: Use a mobile cart with a flat surface as your folding station. Look for a cart with wheels, so you can easily move it around as needed. This allows you to utilize any available space in your laundry room for folding, and then store the cart away when not in use.
When designing your compact folding station, consider adding additional features such as storage compartments for folding supplies, hooks for hanging hangers, or baskets for sorting folded clothes. Keep the area well-lit to ensure visibility and an enjoyable folding experience.
The goal of a compact folding station is to provide you with a dedicated space for efficient folding while maximizing your available space. Choose the option that suits your laundry room layout and style preferences, and enjoy the convenience and organization it brings to your laundry routine.
Rolling Carts for Laundry Essentials
Rolling carts are a versatile and practical addition to any small laundry room. They offer mobility and storage space, allowing you to easily transport laundry essentials and keep them organized. Here are some ideas for utilizing rolling carts in your laundry room:
1. Laundry Supplies Cart: Use a rolling cart specifically designated for laundry supplies. Stock it with detergent, fabric softener, stain removers, dryer sheets, and other essential laundry items. Consider using labeled bins or baskets within the cart to keep everything organized and easily accessible.
2. Sorting Cart: Utilize a rolling cart with multiple compartments or labeled bins for sorting laundry. Assign specific compartments for whites, colors, and delicates. As you sort your laundry, simply place each item in the designated section. This will make it easier when it comes time to wash, saving you time and effort.
3. Folding Cart: Opt for a rolling cart with a flat surface or a fold-out table for convenient folding. This cart can be moved around as needed to provide a dedicated area for folding clothes. Once you’re finished folding, you can quickly roll the cart away to keep your laundry room tidy and functional.
4. Hanging Rack Cart: Look for a rolling cart with a hanging rack or attach a hanging rail to a standard cart. This allows you to hang garments that need to air dry or be ironed. Simply roll the cart close to your washer or dryer for easy access and efficient laundry tasks.
5. Mobile Ironing Station: Create a mobile ironing station by using a rolling cart with a built-in ironing board or attaching a fold-out ironing board to the top of the cart. This allows you to move the ironing station wherever it’s convenient, saving you from the hassle of setting up and taking down a traditional ironing board.
6. Linen Storage Cart: Use a rolling cart to store clean, folded linens and towels. This cart can be easily rolled into the laundry room when you’re transferring clothes from the dryer, making it convenient to immediately fold and store linens without having to carry them to another area.
7. Mobile Hamper: Invest in a rolling laundry hamper with multiple compartments or removable bags. This allows you to easily transport the different loads of laundry to and from the laundry room. With separate compartments, you can pre-sort your laundry as you go, making the washing process more streamlined.
Ensure that the rolling cart you choose is durable, has sturdy wheels, and can withstand the weight of your laundry essentials. Look for carts with brakes on the wheels to keep them in place when needed. Consider the size and height of the cart to ensure it fits comfortably in your laundry room and can be easily maneuvered.
Rolling carts offer flexibility and functionality in small laundry rooms, providing storage space and mobility for your laundry essentials. With a well-organized rolling cart system, you can streamline your laundry routine and keep your laundry room neat and efficient.
Use of Pocket Doors for Space Saving
Pocket doors are an excellent space-saving solution for small laundry rooms. Unlike traditional swinging doors that require additional clearance for opening and closing, pocket doors slide into a concealed compartment within the wall, maximizing the available space in your laundry room. Here’s why pocket doors are a smart choice:
1. Maximizing Floor Space: Pocket doors eliminate the need for clearance space typically required for swinging doors. By sliding into the wall, pocket doors create more usable floor space in your laundry room, allowing you to maximize storage, add furniture, or simply move around with ease.
2. Improved Traffic Flow: In small laundry rooms, every square inch counts. Swinging doors can disrupt the flow and make maneuvering around the room challenging. Pocket doors, on the other hand, offer seamless movement without obstruction. They allow for smooth traffic flow between the laundry area and other parts of the room or adjacent spaces.
3. Concealed Storage: The space created by pocket doors when opened can be used to incorporate hidden storage solutions. You can install recessed shelves or cabinets within the wall cavity, providing discreet storage space for detergent, cleaning supplies, or other laundry essentials. The concealed storage enhances the overall organization and functionality of your laundry room.
4. Design Flexibility: Pocket doors come in various styles and materials, offering design flexibility to complement your laundry room decor. You can choose from a range of finishes, such as wood, glass, or even mirrored options. This allows you to customize the door to match your personal style and create a cohesive look in your laundry room.
5. Space for Fixtures and Appliances: Pocket doors provide additional space for placing fixtures or appliances in your laundry room. You can utilize the wall space where the door slides into to install a wall-mounted drying rack, fold-out ironing board, or hanging rod. This makes efficient use of the available area and gives you more functionality within your laundry room.
6. Privacy and Noise Reduction: If your laundry room is connected to a shared or highly trafficked area, a pocket door can provide privacy and noise reduction. When closed, the door slides into place, creating a sound barrier between the laundry room and the rest of the space. This makes it ideal for apartments, condos, or laundry rooms near bedrooms or living areas.
When considering a pocket door for your laundry room, consult with a professional to ensure proper installation. The construction of a pocket door involves modifications to the wall structure, so it’s important to have it done correctly for smooth operation. Additionally, choose a pocket door system with high-quality hardware to ensure durability and reliability.
Pocket doors are an efficient and stylish space-saving solution for small laundry rooms. With their ability to maximize floor space, improve traffic flow, and provide hidden storage, pocket doors can transform your laundry room into a functional and aesthetically pleasing space.
Conclusion
Creating a functional and visually appealing laundry room, especially in a small space, is all about making the most of what you have. With careful planning, smart storage solutions, and creative design ideas, you can transform your small laundry room into an organized and efficient space.
By utilizing vertical space through the use of wall-mounted shelves, cabinets, or pegboards, you can maximize storage and keep laundry essentials within easy reach. Consider incorporating multipurpose furniture and compact appliances to save space while maintaining functionality. Install sliding doors or pocket doors to optimize space utilization and provide a sleek and seamless look to your laundry room.
Think outside the box when it comes to storage solutions. Utilize narrow spaces, such as corners or gaps between appliances, by installing slim storage cabinets, rolling carts, or fold-down solutions. Consider creative ideas like hanging laundry baskets or under cabinet lighting for added convenience and improved functionality.
An organized and efficient laundry nook is essential in small spaces. Implement sorting and storage solutions, such as rolling carts, open shelving, or hidden cabinets, to keep your laundry essentials neat and easily accessible. Take advantage of every nook and cranny, including the back of the door or narrow walls.
Remember that the design of your laundry room should not only be functional but also visually appealing. Incorporate decorative elements and personal touches to create an inviting atmosphere. Lighting plays a crucial role in enhancing the ambiance of the space, so consider under cabinet lighting or other suitable options to create a well-lit environment.
In conclusion, with thoughtful planning, efficient storage solutions, and creative design ideas, you can transform your small laundry room into a functional, organized, and visually appealing space. By maximizing every inch and utilizing innovative techniques, you can create a laundry room that meets all your needs while maintaining a stylish and enjoyable environment.
Frequently Asked Questions about Small Laundry Room Ideas: 19 Compact Designs To Save Space
Was this page helpful?
At Storables.com, we guarantee accurate and reliable information. Our content, validated by Expert Board Contributors, is crafted following stringent Editorial Policies. We're committed to providing you with well-researched, expert-backed insights for all your informational needs.


0 thoughts on “Small Laundry Room Ideas: 19 Compact Designs To Save Space”